Handmade Christmas ornaments

Christmas in July

Handmade Christmas ornaments? Yes, once again it is “Christmas in July.” It’s me, Ralphie the Bunny, to share with you the Christmas ornaments that Christine recently created. Go figure that a pink bunny would be talking about Christmas items!

Ralphie with handmade Christmas ornaments

Supplies for Handmade Christmas Ornaments

To create her pieces, Christine used a variety of items made by the DecoArt company. You can see the craft supplies shown below. She used the items: Glistening Snow Writer, Paper Effects (pearl color), Snow Writer and Craft Twinkles Seasonal Sparkle (6-pot paint pot set).

DecoArt craft items

Blue & Pearl Flower Handmade Christmas ornament

With the Paper Effects (white pearl color), she created this pretty design on a flower shaped ornament. First she hand-painted a design on the flower and then she added the pearl colored Paper Effects over her hand-painted design.

Blue and pearl flower handmade ornament

Gingerbread Boy Handmade Ornament

Another handmade Christmas ornament that Christine created was this gingerbread boy. She used the Snow Writer to make all of the white details on the piece. It creates a slightly textured and raised surface to resemble snow. After using the Snow Writer, she used the Glistening Snow Writer over the surface to make it look glittery.

Gingerbread boy handmade ornament

Sparkled Colorful Star Handmade Christmas Ornament

Christine also made a sparkly star handmade Christmas ornament. For this piece she first painted each layer on the star with acrylic paint. Then she used corresponding glitter colors from the Craft Twinkles Seasonal Sparkle paint pot set. Adding a coat of the Craft Twinkles added a touch of festive sparkle to the hand-painted surface.

Vibrant star handmade ornament

Christine and I hope you enjoyed a little bit of Christmas during July by looking at the festive handmade ornaments that she made. Have a sparkly and Christmas-y July!

Handmade Christmas ornaments

Posted in Christmas, Lilly Bug Studio | Tagged , , , , , , , , , | 2 Comments

Purse Magnets created with wood

Purse Magnets made in wood

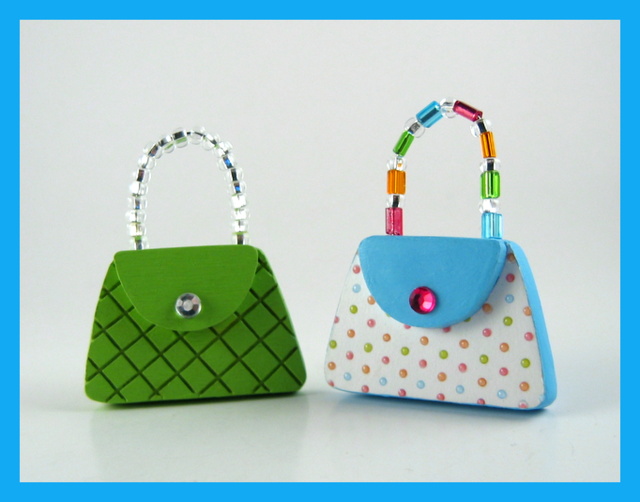
Hello everyone! It’s me, Ralphie the Bunny and I’m back to show you how Christine made her purse magnets. In the photo below you can see the finished product. Aren’t they cute? Don’t you want one or two for your fridge or to give as a gift? Sorry, the sales bunny in me is coming out right now.

Ralphie with wooden purse magnets

Custom Cut Purse Pieces

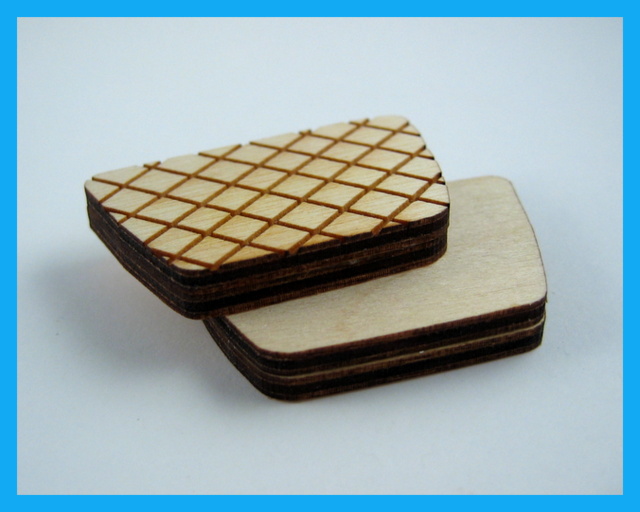
Christine had her purse designs custom cut by a business called the “Laser Lady.” She sent the Laser Lady her specific illustrations for the purse magnets. Later Christine received the carefully cut wooden pieces shown below.

Wooden purse magnets before they were painted and put together

Wooden layers

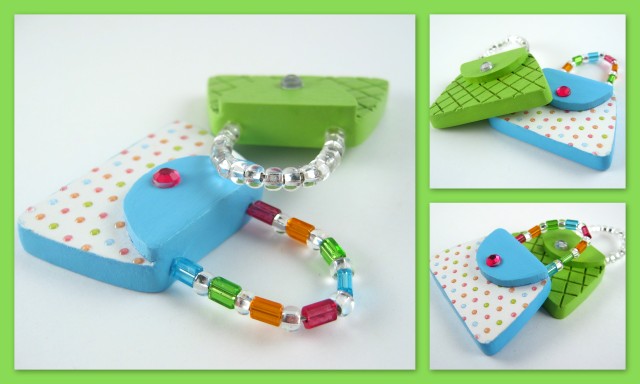
You can see that there are two layers of wood for the purse bases. Christine needed to glue the layers together. She used the DecoArt Wood Glue shown below. After she applied the glue, she used a few clothespins to clamp the layers together as the glue cured. Christine really loved using the wood glue. The wood glue worked very well.

DecoArt Wood Filler, Paper Effects, Wood Glue

Using wood filler on the purse magnets

After the gluing was done, Christine wanted to hide the seams between the layers of wood. She wanted the edges of her purse magnets to look smooth and seamless. To help her achieve a smooth edge to the purses, Christine used the DecoArt Wood Filler shown above. She dipped a fingertip into the wood filler and then lightly rubbed the filler onto the purse edges. After the filler was completely dry, Christine lightly sanded the edges to make them as smooth as possible.

Purse magnets

Smooth seams and shiny dots

When the sanding was finished, she was able to paint and decorate the purse magnets. In the photos above you can see how wonderfully smooth and seamless the edges look. Another product that Christine used to embellish one of her purse magnets was a product called “Paper Effects” by DecoArt. She used the clear color of Paper Effects to make clear, shiny dimensional dots on the polka-dotted purse surface. Can you see the shiny dotted surface? It looks like you should be able to see the shiny dots in the photo below. Christine and I hope that the dimensional dots show up well and we also hope that you enjoyed today’s post. I will be signing off for now. Talk to you soon.

Purse fridge magnets

Posted in Lilly Bug Studio, Magnets, Work in progress | Tagged , , , , , , , , , | 1 Comment

Nature trail scenery 1st ride

Nature trail scenery begins in the smallest of ways

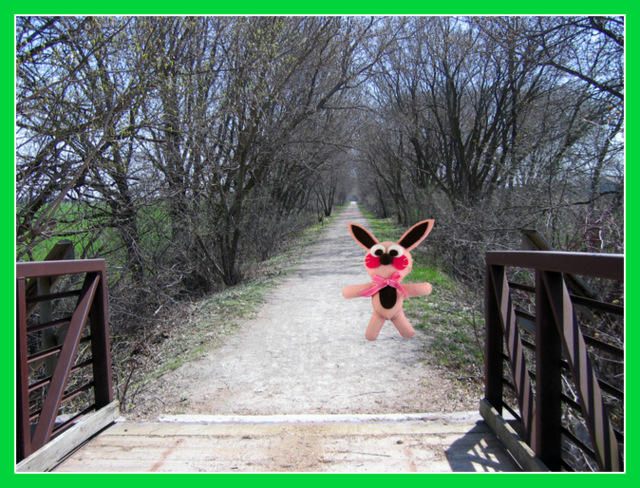
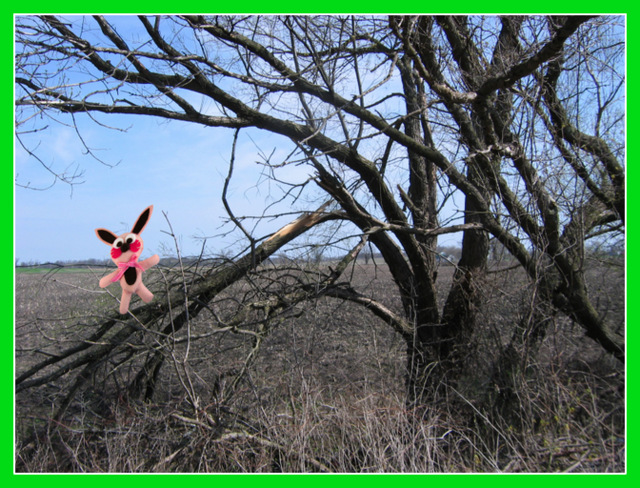
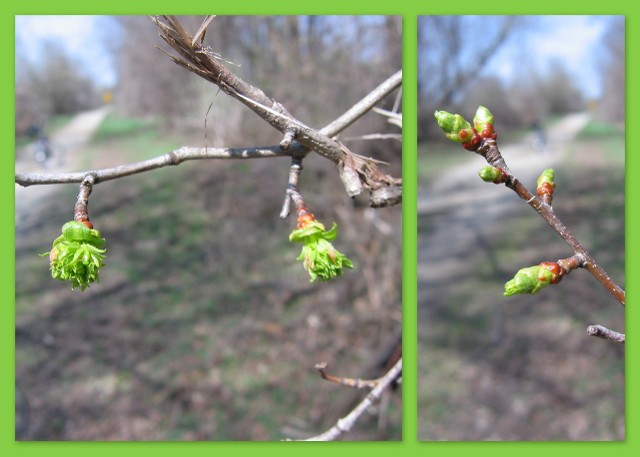
Nature trail scenery is slowly beginning to emerge on the trail near Christine. Yesterday on May 1st, she ventured on her first ride of 2013! After a long and brutal Winter in Wisconsin, the day to ride on the trail finally arrived. You can see how bleak the trail looks behind me in the following photo. Nonetheless, there is some green fighting it’s way into the nature trail scenery. You can see the green grass making its entrance to the great outdoors. And if you begin to look very closely there are green buds waiting to burst open any day.

Ralphie near the bridge on the nature trail

Unfortunate tree damage

About two weeks ago there was a terrible ice storm that covered everything outside. Due to the heavy coat of ice and the winds, many tree limbs in the area were severely damaged. As Christine rode along the trail, she noticed some trees with large branches that snapped.  It is such a sad sight to see damaged trees.

Ralphie standing on broken branch

Ralphie the Bunny’s Advice

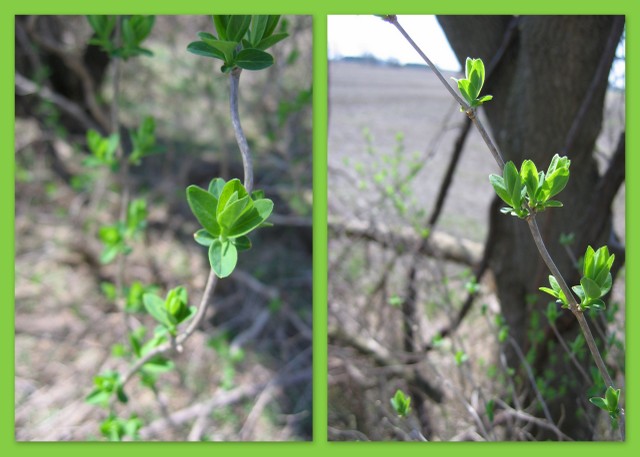
As I mentioned if you keep your eyes open and look for the “green”, you will find it in some small almost unnoticeable packages. For instance, Christine saw these pretty green buds behind one of the benches along the trail. If you don’t stop to take notice at these things, they can remain hidden practically right under your nose. My advice is to slow down and look for the good, hard-to-find treasures all around you.

Buds on branches - nature trail scenery

A damaged tree stands in the way

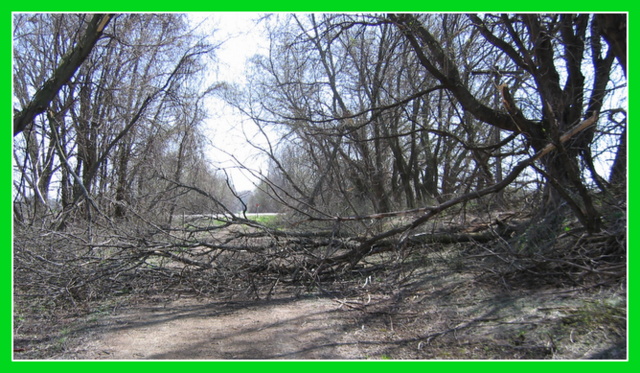
Christine wanted to take in more of the nature trail scenery but one thing prevented her from continuing on her venture. There was a huge tree branch laying across the entire width of the trail. That meant that Christine’s trip was shorter than she had planned.

Broken tree branches over the nature trail scenery

The tree bark is drying

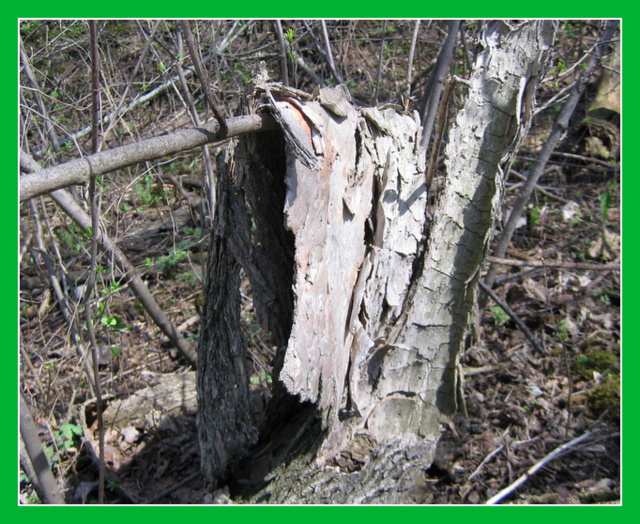
Even though her riding plans were altered, Christine still found some nature trail musings while riding yesterday. One thing that caught her curiosity was this piece of tree bark draped over a tree branch. It looks as though someone hung the piece of bark to dry on the branch like a piece of laundry drying on a clothesline.  Who knew that you could hang bark out to dry?

Hanging tree bark on branch - nature trail scenery

Bicycle Bumper Stickers?

If Christine could place a bumper sticker on her bicycle it would read, “I brake for the details” or “I brake for the unnoticed.” She found some little details to “brake” for on her way home. As she was riding, a couple of little bright green spots beckoned to her from the corner of her eye. Slam! Her brakes were applied and she went to the spot where she noticed these tiny green gems. Such cute and bright little buds saying “hello” to anyone who stops to listen. On many of her previous bike rides, there have been a great number of times when Christine’s brakes are on, stopping to catch the small practically unnoticed treasures along the trail. The next time she’s out on the trail she hopes that the damaged tree branch is removed from the trail so she can explore further. I hope that you have enjoyed today’s discussion. This is “Ralphie the Bunny” signing off for today. Take care and see you next time in the blogosphere.

Nature trail scenery - buds growing

Posted in Nature, Photography, Places to see | Tagged , , , , , , | 1 Comment

Craft home decor – Cake and embossed squares

Ralphie with items used to make craft home decor

 Craft Home Decor Items

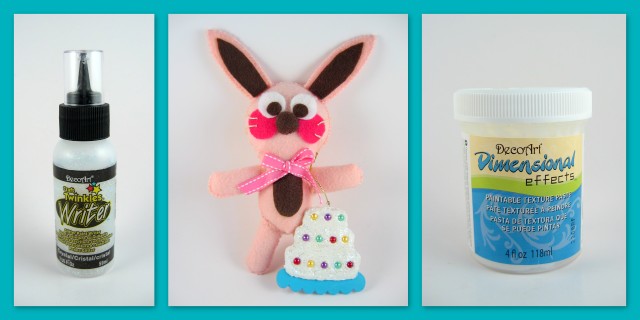
Craft home decor items are on topic today. As you can see from the photo above, I’m posing with a cute cake ornament and the two main craft supplies that were used to make the cake. The last few days Christine has been trying out some new craft items in her studio. Today’s discussion will be about working with a couple of craft products made by DecoArt, the Craft Twinkles Writer in the Crystal color and Dimensional Effects.

Embossed magnet squares - craft home decor

Add some texture to your home decor crafts

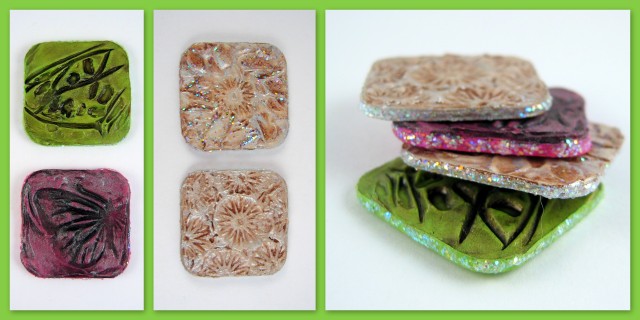
You can use Dimensional Effects to create texture and dimension on the surface of your craft project. To create the craft home decor items shown above, Christine used some cut out layered squares made with cereal box material. She applied the Dimensional Effects with a wooden craft stick to the squares. Then she allowed it to set for about 30 minutes. After it slightly dried, she used some decorative stamps to impress into the textural paste. When she had the impressions completed, she allowed them to dry overnight.

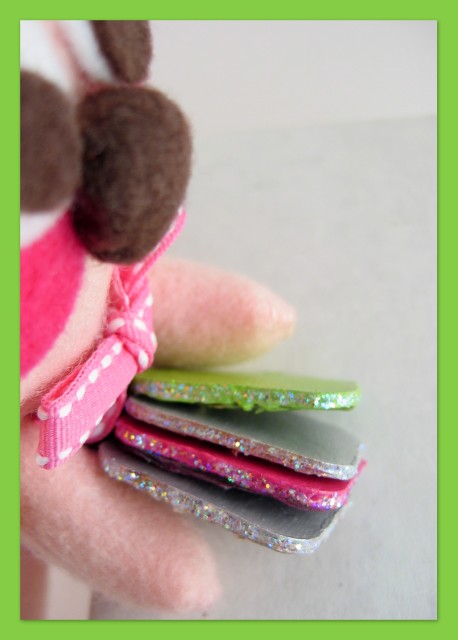
Ralphie holding embossed decorative squares

   A Glittery Edge to Craft Home Decor Pieces

When the Dimensional Effects was completely dry, Christine painted the surface of each square with acrylic paints. To accentuate the impressions and texture created on the surface, Christine applied a thin watery coat of paint and used an old cloth to rub off the second color over the raised areas. Then to finish off the edges, she added some sparkle with the Craft Twinkles Writer in the Crystal color. Once all of the painting and embellishing is done, you can glue a magnet to the back and use them as decorative fridge magnets.

Cake ornament - craft home decor

Create a frosting texture

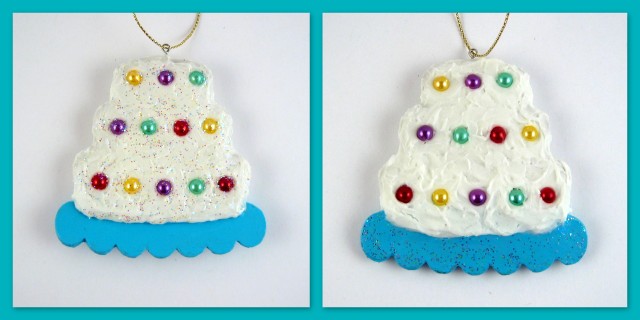
Another craft home decor piece that Christine created was this layered festive cake ornament. Again, she used layered cereal box material as her base. Then she used Dimensional Effects to create a textured frosting surface for the cake. After a thick “frosted” layer was applied, Christine added some colored pearl embellishments to decorate the cake. Since the frosted surface was thicker than the surface on the decorative squares, it took a longer amount of time to dry. It also formed cracks in some spots as it was drying. Christine used an old paintbrush to brush in some extra Dimensional Effects over the cracked areas. Once the cracks were filled in, she used some paint from Twinkles Writer to brush over the surface of the frosting on one side of the ornament. On the reverse side, she used the Twinkles on the cake platter. How do you like the craft home decor pieces that Christine made? We both hope that you enjoyed learning about these craft products and that it has inspired your own craftiness. Please stop by again for a visit!

Posted in Magnets, ornaments, Tutorial | Tagged , , , , , , , , , , | 2 Comments

Penguin sculptures – Ballerina and Pom Pom penguins

Ralphie the bunny with Dremel tool drill bit

A close-up look at Christine’s ballerina and pom pom penguin sculptures

Today I’m going to share with you how Christine created some ballerina and pom pom penguin sculptures. When Christine was working on the penguins, she needed to drill some holes into the resin feet of the penguins.  She uses a small drill bit on her Dremel power tool to make the holes. Yikes! I was very close to the drill bit that was used to drill holes into the penguins’ feet.  Look at all of the kinked resin pieces left on the drill bit after Christine drilled the holes. Why do holes need to be drilled into the feet?

Ralphie the bunny next to work-in-progress light bulb penguin sculptures

Wire leg armatures for the penguin sculptures

The holes need to be drilled so the wires for the legs can be attached to the penguin sculptures. In the photo shown above the wires are a bit too long. They need to be trimmed down a bit.

Ralphie the bunny standing between penguin sculptures

Progress continues on the penguin sculptures

Now the feet are securely attached with the FixIt Sculpt by Aves Studio. You can also see that Christine used aluminum foil to help form the tails for the penguin sculptures. She used wire mesh and masking tape to help make the penguins’ wings.

A close-up view of how the pom poms were attached to the penguin sculpture

How the pom poms were attached 

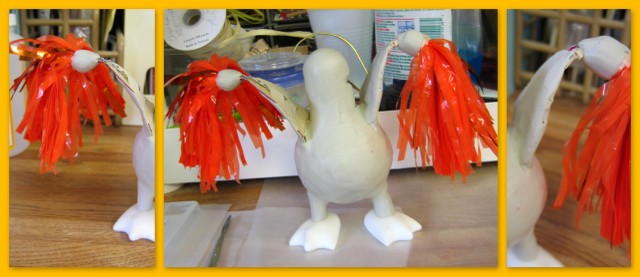
Here’s a close-up view of how the pom poms were attached to the penguin’s wings. It was a little challenging for Christine to create the pom poms. She bought a store bought pom pom and then cut shorter strips to use for the pom poms. After she created the pom poms, she used the wires at the base of the pom poms to securely attach them to the wings.

Light bulb penguin sculptures covered with Fix-it sculpt

More sculpting completed

Now the penguin sculptures are almost completely sculpted with the FixIt sculpt. The ballerina is standing with its wings in position to do a beautiful ballet routine. And the pom pom penguin is holding the poms ready to do a dance and cheer.

Ballerina penguin sculpture

Dance little penguin ballerina, dance!

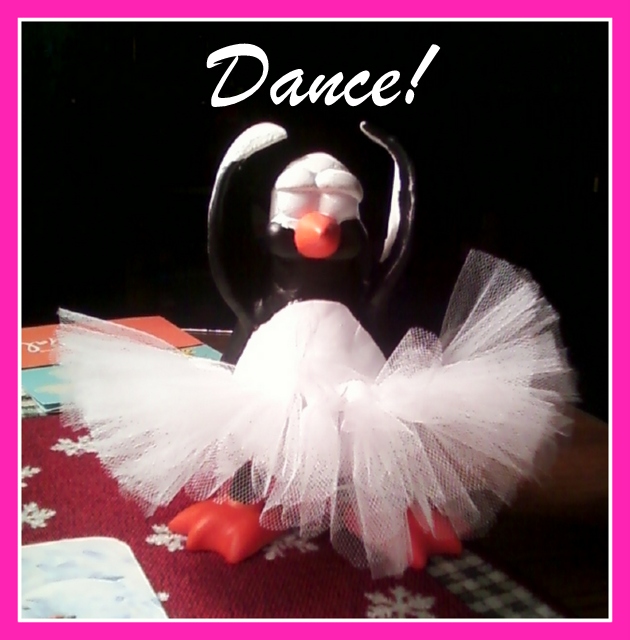
Christine had fun creating the ballerina tutu for the penguin sculpture. She used strips of tulle that she tied to a satin cord to make the tutu. As she worked on it, she couldn’t wait to attach it to the penguin’s body. She found some useful tips on how to make the tutu here at this blog “Duds for Dolls.”

Pom Pom penguin sculpture

U-rah-rah! The pom pom penguin sculpture is completed!

Ralphie next to a ballerina penguin sculpture

Here I am posed next to the penguin ballerina sculpture. She’s so busy working on her dance routine. I hope you enjoyed this look at how Christine created her Up-Cycled light bulb penguin sculptures. Take care!

Posted in Lilly Bug Studio, Sculptures, Up-cycled projects, Work in progress | Tagged , , , , , , , , , , , , | 1 Comment

Birthday cake magnets & giveaway

Ralphie with a Kindred Spirits plaque

Birthday Cake Magnets & Giveaway News

Birthday cake magnets? I do have some news about birthday cake magnets and other goodies! Today it’s Christine’s birthday and I have some giveaway news to share with you. Before I reveal the news about the giveaways, I wanted to let you know about the sign I’m standing next to. Christine’s friend, Kate, sent this lovely hand-painted wooden plaque to her as an early birthday gift. Kate hand-painted it herself and the colors she selected match perfectly in Christine’s room. It reads “Kindred Spirits” because both Kate and Christine have been fans of the Anne of Green Gables books where Anne is always looking for a Kindred Spirit.

Birthday cake magnets set

Enter to Win this Birthday Cake Magnet Set!

Since it is Christine’s birthday, she wanted to celebrate by giving away a set of her handmade fridge magnets. In the photo above you can see the set she is giving away this year. How can you win this set of magnets? Read on…….

Birthday cake magnets in 5 specialty flavors

Which cake flavor is Christine’s favorite?

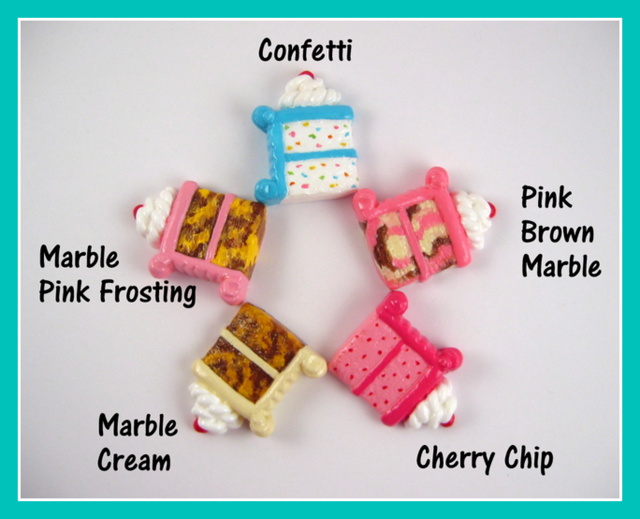
Here are five assorted birthday cake magnets each labeled with a specific flavor. Christine just added these specialty flavor birthday cake magnets to her Etsy store, Lilly Bug Boutique. Within this set of five cake slices is one of Christine’s favorite flavors. To enter to win the contest, leave a comment with your guess of which cake flavor is her favorite. All comments will be included in the drawing whether or not they guessed the correct flavor. Please leave only one comment/guess. Those who leave more than one comment will only be entered once into the drawing. The drawing ends on Friday, March 22nd at 11:59 CST. Please invite others to participate. Good luck!

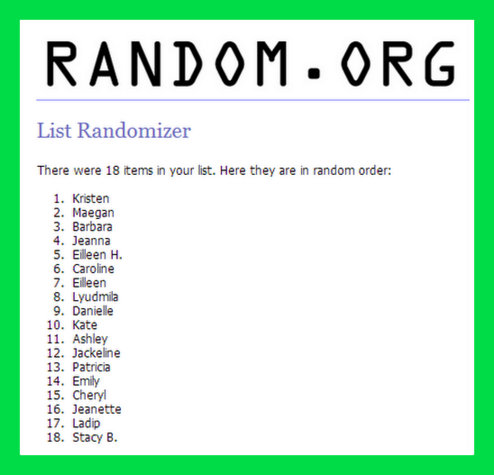
Giveaway closed! Christine’s favorite cake flavor is “Cherry Chip.” The winner of the magnets set is Kristen. Congrats!Birthday giveaway winner

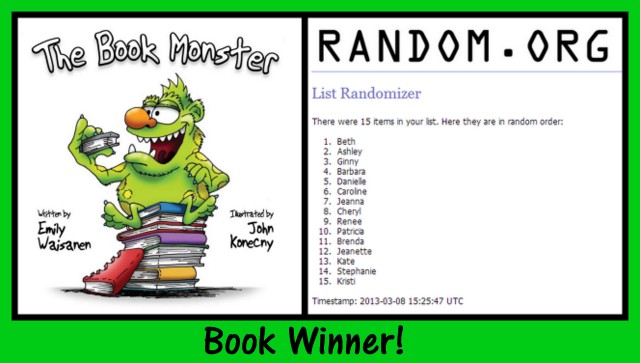
Book Monster giveaway winner

The Book Monster giveaway winner!

Before I end today’s post, I have one more bit of important news to share. The winner of a copy of Emily Waisanen’s “The Book Monster” is Beth. Congratulations! If you missed my book review of Emily’s book, please click here to see it. I think you will enjoy learning about her adorable children’s book.

Posted in Children's Books, Fridge Magnets, Giveaways, Lilly Bug Studio | Tagged , , , , , , , , | 18 Comments

Book Monster Review and Giveaway

Ralphie gives a book review on "The Book Monster"

The Book Monster Review & Giveaway

The time has arrived! It is time for Ralphie’s Book Review of Emily Waisanen’s children’s book titled “The Book Monster.”  It is such an enjoyable book. As you can see I have my nose buried in the book in the photo above. When you read this book you will learn about the variety of books that the Book Monster loves to eat. You will also discover one of his favorite places to munch on books. Plus, you will find the tastes and flavors of books that the monster enjoys the most. Who knew books could be so delicious and have such distinct flavors?

Ralphie reads The Book Monster

Munch, munch, munch on tasty books

Here’s a little peek at the book-hungry monster dining to his heart’s delight on books of his liking. The clever writing style and lighthearted humor of this book will bring plenty of enjoyment to readers young and old alike.

Ralphie reading The Book Monster

Where is the monster going to……

The illustrations compliment the story very well. They are filled with bright colors and humor that matches perfectly with Emily’s writing style of the book. Here is one of my favorite parts in the book. The wide open illustration on the pages give you the feeling of an expanse of delicious books as far as the eye can see. Can you guess where the book monster is? It is one of his favorite places to find yummy books to eat.

Book Monster Author Emily Waisanen

Photograph by Kristel Stephany of Capture the Moment
Photography of Oakfield, WI

Emily Waisanen – The author

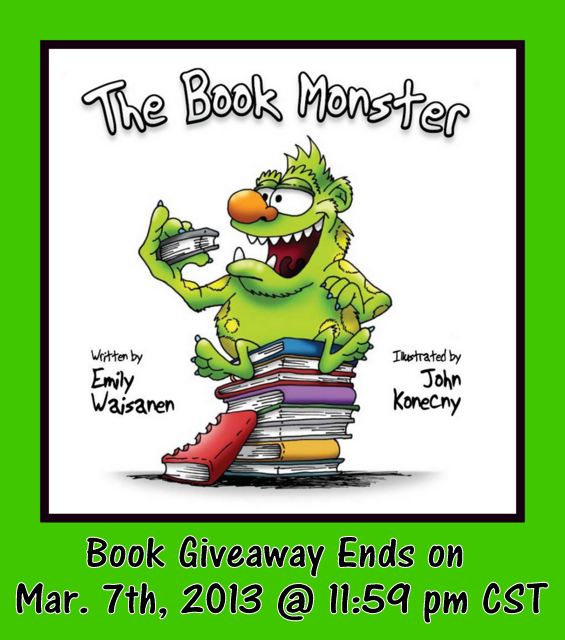
Here’s Emily and she’s offering a free copy of her book to one lucky reader who leaves a comment at this blog post. This book giveaway is only open to US residents and you must leave a comment by 11:59pm CST on March 7th, 2013. Each person who leaves a comment will be entered into a drawing and one lucky winner will be announced on Christine’s birthday, March 8th.

Book Monster Giveaway

Contest Closed! But please feel free to comment.

Please leave a comment about your favorite book from your childhood. And yes, I did say that the winner will be announced on Christine’s birthday. On March 8th, another giveaway begins. She’s planning on having a giveaway of a set of her cute fridge magnets for her birthday. Stay tuned and please remember to leave a comment sharing your favorite book from your childhood for a chance to win a copy of “The Book Monster.”

Winner Announcement!

Emily’s book is published by Orange Hat Publishing, which is a name you will hear about again in the months ahead. You can purchase Emily’s book on Amazon or directly from her. Please visit her Facebook page, Emily Waisanen Author to learn more about Emily and her book. You can also find out where she will be doing book signings and other fun book events that she will be participating in.

Posted in Children's Books, Misc | Tagged , , , , , , | 16 Comments

Art Walks from 2012

Ralphie getting art walk pics ready for the blog update

Art Walk Overview by Ralphie the Bunny

The life of a bunny blog reporter is such a busy one! As you can see from the photo above, I was getting the photos ready for this blog update. Today I’m going to share with you Christine’s experience of exhibiting at a few local art walks from last year. She participated in three art walks in 2012. On every third Friday of the month there is a “Tour the Town” Art Walk in downtown Fond du Lac. A variety of participating businesses open their doors and welcome artists to display and sell their items from 5pm-8pm. You can learn more about the “Tour the Town” art walks at their website.

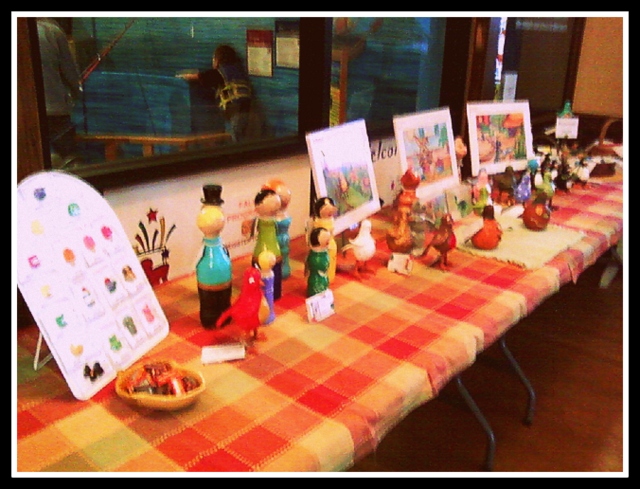
Christine's table at the October "Tour the Town" Art Walk

Christine’s First Art Walk – October 2012

The first art walk that Christine attended was in October at the Children’s Museum of Fond du Lac. At that time the Children’s Museum was located in the building of the Windover Center for the Arts. The photo above shows the table display of her pieces including sculptures made with recycled bottles and burned out light bulbs. Christine apologizes for the poor photo quality. She didn’t bring her camera along so she was stuck using the camera on her phone. Unfortunately, it was a slow night for art walk traffic at the Children’s Museum, but a busy night for the pajama party at the museum that evening. Christine enjoyed seeing all of the cute kids dressed in their fuzzy PJs and slippers. It helped the time go by on a dark, cold autumn evening. She met some friendly people that passed by and decided to look at her artwork and to visit.

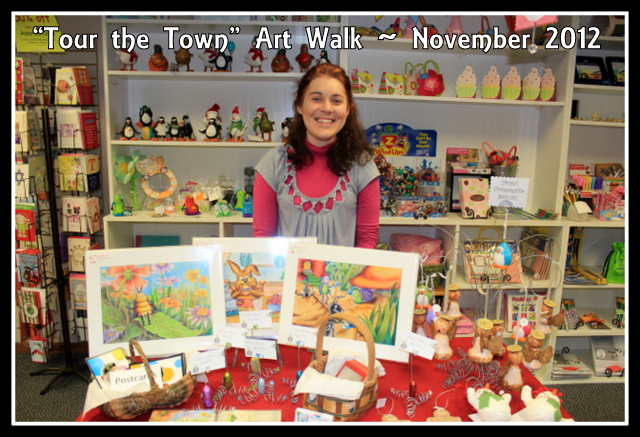
Christine with her display at the "Tour the Town" Art Walk in November 2012

Christine’s Second Art Walk – November 2012

The next art walk that Christine went to was in November at a cute shop called As You Wish. This art walk was busier than the one in October. Plus, there were 4 other vendors selling their items that evening at As You Wish. There was a local children’s book author, Emily Waisanen, directly across from where Christine had her table. She wrote a delightful book titled, “The Book Monster.” Emily was signing copies of her book during the art walk. To learn more about Emily and her book please visit her Facebook page, Emily Waisanen Author. During lulls in people traffic, Christine and Emily chatted. Christine learned about how Emily had her book published.

Emily Waisanen at her book signing table at the "Tour the Town" Art Walk

Here’s a photo of Emily at her book signing table.

Front window display at "As You Wish" in downtown Fond du Lac

Look at the cute front window display at “As You Wish.”

Nicci Martin at the December 2012 "Tour the Town" Art Walk

Christine’s Third Art Walk – December 2012

The last art walk that Christine attended was in December at the Gallery & Frame Shop. There was a big snowstorm the day before the art walk which may have kept people from venturing out the following evening for the art walk. It was a slow night, but Christine met some nice people there. The photo above is of artist, Nicci Martin, and her artwork display. She creates wonderfully detailed hand-painted pieces on wood and other media.

Christine at the Gallery & Frame shop in downtown Fond du LacThere’s Christine at her table with her fridge magnets, recycled light bulb sculptures, etc. This year Christine has taken a break from doing the art walks, but she plans on doing them again after this cold, long winter in Wisconsin is over with.

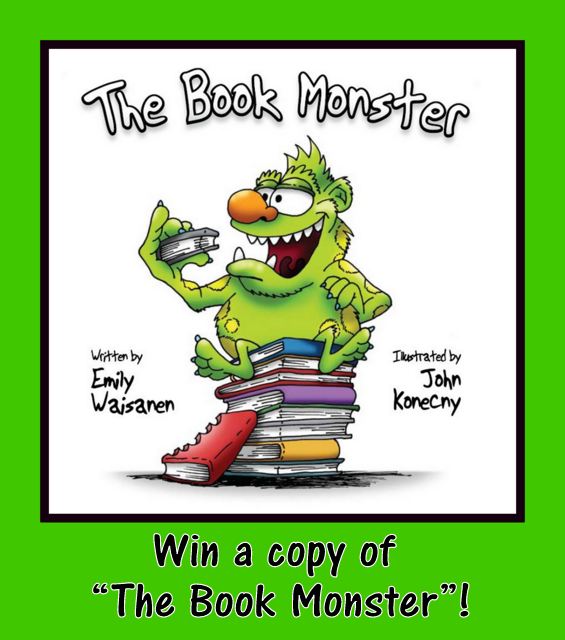
"The Book Monster" by Emily Waisanen

Book Monster Giveaway Begins on March 4th!

Before I end this update, I want to give you a “head’s up” about my next update, which will be on March 4th. I will be doing a book review of “The Book Monster” and in that post you can enter to win a copy of Emily’s book. Don’t miss it!

Posted in Art Walks, Lilly Bug Studio, Places to see | Tagged , , , , , , , , , , , , | Leave a comment

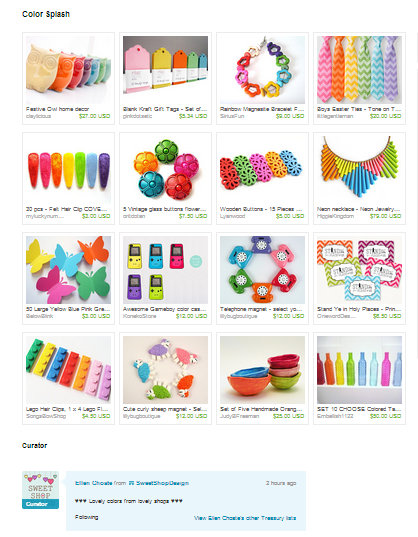
Etsy Treasury – “Color Splash” by Ellen of “Sweet Shop Design”

Etsy Treasury “Color Splash”

Today Ellen Choate of “Sweet Shop Design” curated this lovely Etsy treasury titled “Color Splash.” She included two of my fridge magnet designs, Retro Rotary Phones and Colorful Curly Sheep in her collection. Ellen’s treasury is filled with an array of fantastic items. Each item that she chose fits in perfectly with her wonderfully cheerful color palette. Please stop by to check out her Etsy treasury and stop by her Etsy store, Sweet Shop Design, to see a delightful assortment of her high quality digital clip art. She has clip art for  a variety of occasions including Easter and Weddings as well as everyday images. Don’t miss it.

Etsy Treasury Color Splash

Posted in Etsy treasuries | Tagged , , , , , | Leave a comment

New Home Ornaments

Polymer Clay House ornament

Handmade New Home Ornaments

Hello! Today’s topic is about customized new home ornaments. When Christine worked at a Hallmark store she created a handful of house ornaments to give as gifts for family members and a few pieces for one of her co-workers to give as gifts. Above I am posed with an ornament resembling Christine’s parent’s house.

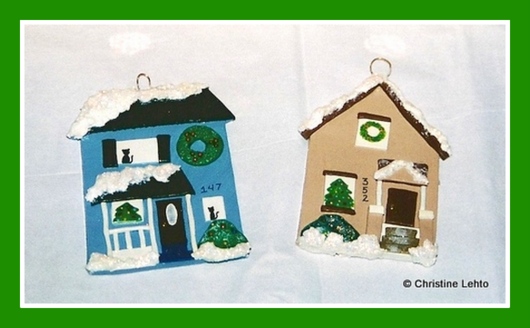
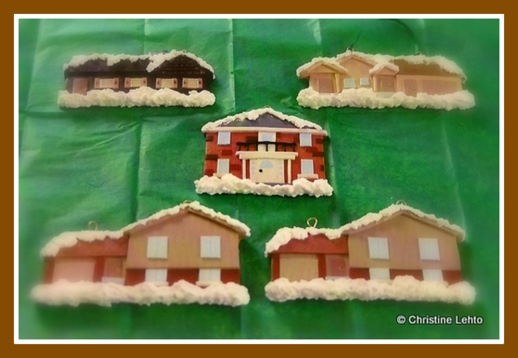
Polymer Clay House Christmas ornaments

New Home Ornaments for Christine’s Sisters

The polymer clay houses shown above were created for her sisters when they moved into their new houses. She added the house number of their new homes and she included the date they moved on the back of the ornament.

Polymer Clay House Christmas ornaments

House ornaments for Christine’s Co-Worker & Her Parents

These houses were a few created for one of Christine’s co-workers. She made an ornament of her co-worker’s own house, one of her co-worker’s brother’s house and another of her co-worker’s parent’s house. Then Christine also created two ornaments of her parent’s house which is also the ornament I’m posing with at the beginning of this blog post.

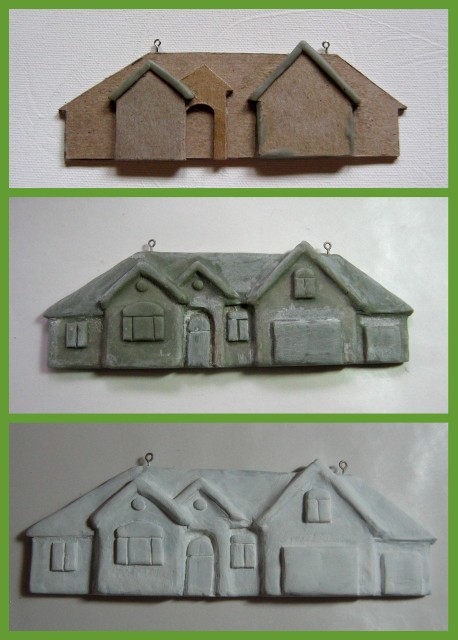
Work in progress photos of new home ornament

A New Home Ornament created in New Materials

After creating those new home ornaments with polymer clay, Christine took a break from making house ornaments. Then two years ago Christine decided to create a new home ornament for her long-distance friend Caroline. This time Christine did not use polymer clay. As you can see in the step-by-step photos above, she used layers of cereal box material cut out in pieces to resemble the architecture of Caroline’s house. Then she applied a thin layer of Apoxie Sculpt to the cereal box surface. Once the Apoxie layer was finished, she coated the surface with gesso.

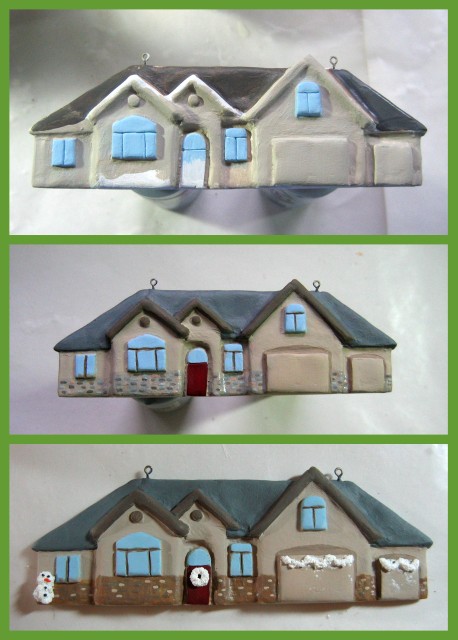
Work in progress photos of new home ornament

Adding Acrylic Paint & Texture

Next the fun began as Christine was able to add color with acrylic paints. In the last photo you can see a wreath, garland and a snowman in white. She used a textured medium called “Snow-Tex” to create those.

Step by step look at creating a handmade new home ornament

New home photo, sketches and finished ornament

Here you can see the photo of Caroline’s house that Christine used a reference to create the sketches and cut out pattern pieces for the new home ornament. And you can see the completed ornament.

Handmade New Home ornament

A new home ornament complete with a new glittery “snowfall”

Christine also added Snow-Tex to the peaks on the roof and to the base of the house. You might have also noticed that she painted the Snow-Tex garland and the wreath green. As a finishing touch she added a coat of sparkly glitter to the snowy surfaces and to the garland and wreath. The only other item left to add was the beaded hanger to display the ornament with.

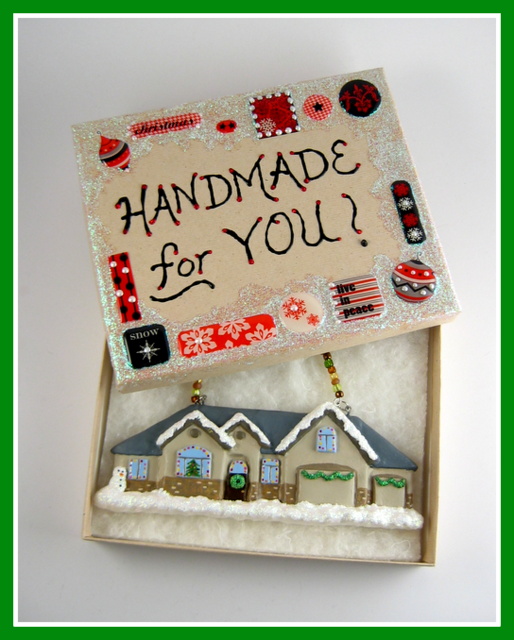
Caroline's New Home ornament in gift box

An Embellished Gift Box for the New Home Ornament

After Caroline’s new home ornament was completed, Christine embellished a gift box to present the ornament in. She added “handmade for you” in puffy paint, some epoxy stickers and finished it off with yes, glitter!

Caroline with her new house ornament

The Ornament on Caroline’s Christmas Tree

When Christine mailed Caroline’s gift to her she asked Caroline to take a photo with her new home ornament. Here you can see Caroline pointing to the ornament hanging on her Christmas tree.

I hope you enjoyed learning about how Christine created her handmade, customized ornaments. I will chat with you later in cyber-land.


Posted in Lilly Bug Studio, ornaments, Work in progress | Tagged , , , , , , , | 7 Comments